Add Character to Walls with Shaker-Style Panelling
Scroll through interior designs on social media, and you'll find DIY Shaker-style panelling in no time. This simple yet impactful wall panel style has become increasingly popular due to its ability to invigorate spaces with a clean-lined, classic aesthetic. Plus, it's the perfect weekend project when you're in the mood for DIY home improvements – it takes just a few hours to completely transform your room.

What Is Shaker Panelling?
The origin of Shaker panelling goes back to the 18th century when the style was conceptualised by the American Shaker sect - a religious group that developed a minimalist design ethos defined by simplicity, symmetry and functionality. Their desire to be self-sufficient meant crafting their own furniture that reflected these qualities, resulting in the invention of Shaker cabinets, doors and panelling. Defined by their raised framework in a rectangular or square format, these designs remain influential today – Shaker-style panelling is a hugely popular choice for adding interest to interiors. It introduces subtle depth to walls, preventing them from looking flat while protecting them from furniture – a purpose wall panelling was developed for.

How To Use Shaker-style Panelling In Your Home
Shaker-style panelling is incredibly versatile, suiting a variety of interior design themes. Whether you want to create impact in white box rooms in a new build or maintain the authentic character of a period property during renovations, Shaker-style panelling will help you achieve it. The panelling's classic look pairs perfectly with traditional furniture but also provides a beautiful contrast to contemporary décor, making it a great option to include in any scheme.
Half-height rectangular installations call to mind country cottages, making this layout ideal for creating a cosy space with a homely atmosphere. Painting the panelling in muted neutrals or earthy tones will enhance this soft effect while styling it with wooden stools, woven baskets, and pastoral prints will evoke an authentic, rustic look.

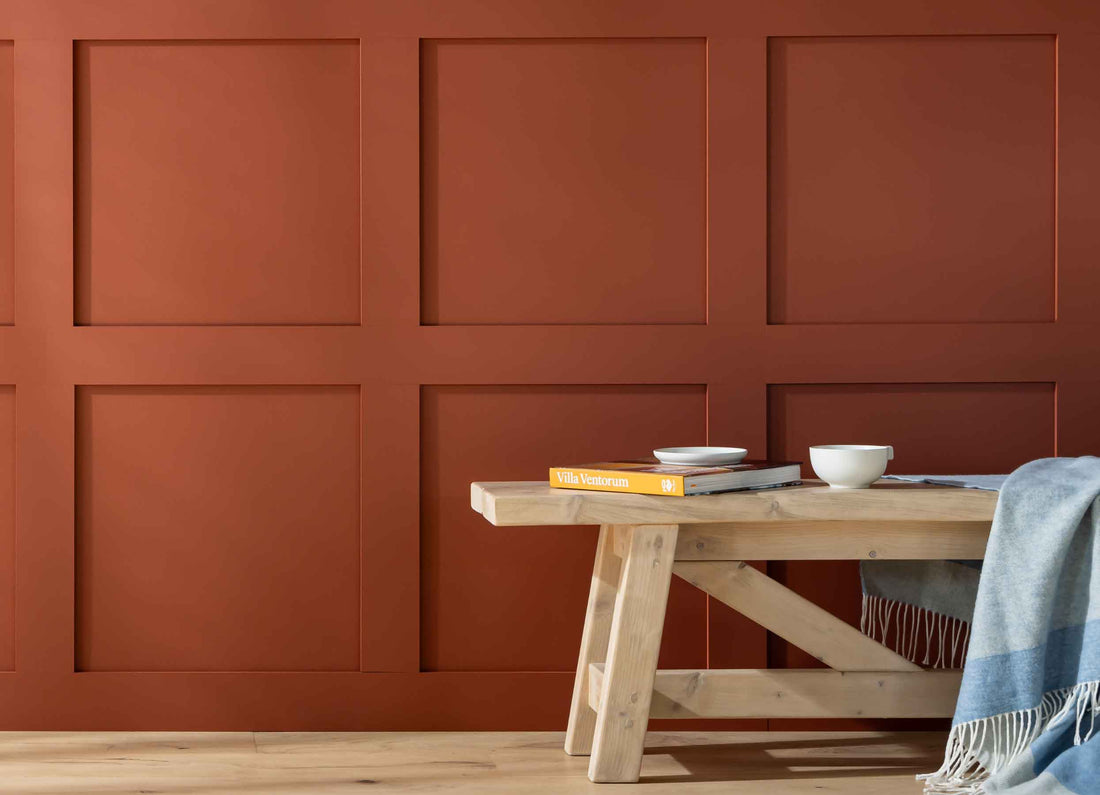
For a dramatic look, opt for a whole wall of Shaker-style panelling in a square layout. This arrangement is the ideal canvas for darker, more atmospheric shades. Combining vivid tones with the panelling's 3D format creates shadowing and depth, adding intrigue where an unpanelled wall wouldn't.
Alternatively, you can cover one-third or three-quarters of your wall with panelling and pair it with a coordinating Dado Rail – the ornate profile beautifully complements skirting and cornices. This will create a traditional look while leaving an area of your wall blank for adding further interest, either through a lighter paint colour or with wall art.

How To Create Shaker-style Panelling
Our MDF Wall Panelling Kit lets you create custom Shaker-style installations in your desired layout and colour. Simply use as many kits as you need to fit the scale of your project. It's all about decorating your walls your way by choosing, creating and customising.
1. Choose
Each MDF Wall Panelling Kit contains eight 1.2m strips, with two widths available. Choose from narrow strips measuring 63mm wide or opt for the 97mm width for more of a statement look.
2. Create
The panelling's layout is entirely up to you. You can arrange the strips in a square or rectangular format, cut them to size and choose the spacing between each section. Please see our fitting guide for further installation information.
3. Customise
Personalise your panelling even further by painting it in your desired shade and finish, customising it to your scheme and creating a space that's truly yours.